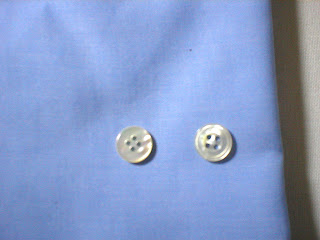
 Excusez l'image je ne suis hélas pas très doué.
Comme il se doit en mesure les boutons ont 4 trous et cousus en croix.
Sous le bouton les fils correspondants aux trous sont entortillés ensemble à la fin du cousage pour solidifier le tout.
Les boutons 4 trous cousus en parallèles sont dans la plupart des cas cousus à la machine.
La nacre
Les puristes le savent sans doute mais je précise pour les autres.
La nacre est extraite des coquillages.
On prélève des petits cylindres sur la coquille de la dimension du bouton voulue ensuite il n'y a plus qu'à couper ces cylindres en tranche (comme du saucisson) suivant l'épaisseur voulue pour le futur bouton.
Ces rondelles ainsi obtenues s'appellent des "pions" qu'il suffit de polir et de percer pour obtenir des boutons
Plus on prend les pions de l'intérieur de la coquille plus la nacre est pure et blanche,plus on s'éloigne vers l'extérieur plus la nacre est jaune.On appelle ça du trocas ou nacre 2ème choix.
Si le pion est prélevé vers l'extérieur coté surface de la coquille il y aura au dos du bouton de petites taches noires ce qui n'est pas un symbole de grande qualité de nacre.
En général les boutons font 2m/m d'épaisseur si ils font moins ce n'est pas non plus un gage de qualité.
Si vous avez acheté une chemise avec des boutons "dit en nacre" regardez bien leur blancheur et regardez aussi sur l'envers.
Si ils sont jaunes c'est du trocas et si il reste des particules de coquille noirâtre c'est du 2 ou 3ème choix.
La vrai nacre pure est blanche avec des reflets et provient en général d'Australie ou de Madagascar.
L'unité de mesure est la ligne (1ligne = à peu prés 2mm)
L'unité de quantité est la grosse ( 1 grosse=12 douzaines soit 144 boutons)
BUTTONS
Again, please excuse my image manipulation skills.
As it should be in custom shirtmaking, these buttons have four holes and are cross-stitched. Under the button, the threads from each hole are twisted into a shank in order to reinforce the attachment. Four-hole buttons which are sewn in parallel are generally sewn on by machine.
Mother of pearl.
As shirt aficionados well know, mother of pearl is obtained from shells. Small cylinders are punched out of the shell in the desired size. Then each cylinder is sliced, like a sausage, to the desired thickness of the future button. We call these rounds pions, or “pawns,” which then are just polished and drilled in order to finish the buttonmaking process.
As you get closer to the inside of the shell, the mother of pearl becomes purer and whiter. As you get closer to the outer edge of the shell, the mother of pearl becomes yellower. We call mother of pearl obtained from that “trocas” or “second-choice mother of pearl.” If the “pawn” is taken towards the outer surface edge of the shell there will be little dark marks on the back of the button. These are not a sign of good quality buttons.
Generally buttons are at least two millimeters thick. If they’re less, it’s not a sign of quality either.
If you’ve bought a shirt with buttons that are supposed to be “shell” or “mother of pearl”, check the whiteness of the buttons and look at the backs of the buttons. If they’re yellowish, they’re trocas, and if you see dark shell markings on the back they’re second or third-choice mother of pearl. Real mother of pearl is an iridescent white and usually comes from Australia or Madagascar. They’re measured in lignes (One ligne is about 2 millimeters). The unit of quantity is the gross (1 gross = 12 dozen, or 144 buttons).
Un grand MERCI à RJMAN pour la traduction !!
Пуговицы
Переведено Андреем Боханко
http://bespokeetc.blogspot.com
Ещё раз прошу извинить меня за качество фотографий.
Обычно при пошиве на заказ пуговицы пришиваются крест-накрест. Под поверхностью пуговицы все нити скручиваются в одну ножку, что делает шов крепким. Если вы видите два параллельных шва, то скорее всего, пуговица была пришита на машине.
Перламутр
Как известно, перламутр получают из морских раковин. Небольшие цилиндры нужного диаметра вырезают из поверхности раковины. Затем каждый цилиндр разрезается на отдельные ”кружочки” желаемой толщины – примерно также, как колбаса нарезается на дольки. Мы называем эти кружочки ”пешками”. Чтобы превратить “пешки” в готовые пуговицы, нужно, во-первых, отполировать их, а во-вторых, просверлить в каждой дырочки.
Чем ближе к внутренней поверхности раковины, тем перламутр чище и белее. И наоборот, при движении к внешней поверхности перламутр желтеет. Мы называем пуговицы, полученные из такого желтоватого перламутра, ”второсортными”. Если “пешка” вырезана совсем близко к внешнему краю, то на её обратной стороне видны маленькие тёмные точки. Это признак не очень качественных пуговиц.
Обычно толщина пуговиц как минимум два миллиметра. Если они тоньше, то опять-таки, это признак не очень высокого качества.
Aucun commentaire:
Enregistrer un commentaire